I love my daughter’s daycare.
I love the teachers, the kids, the other parents. I love how much she learns there.
There’s just one problem.
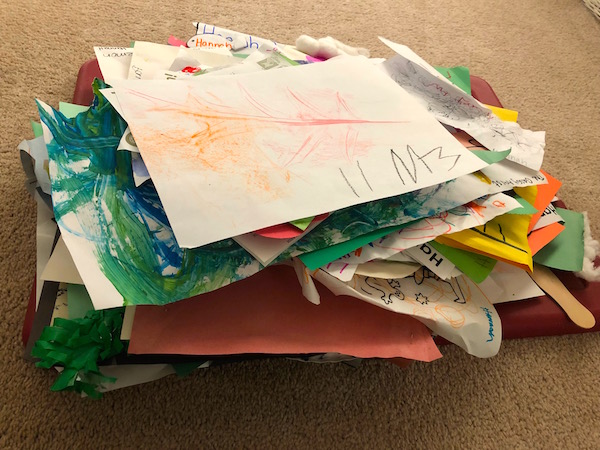
I can not handle the amount of artwork she brings home.
That picture above? That’s just a small fraction of what we have (that’s not already stored, hung up, or thrown away), and our daughter isn’t even 4-years-old at this writing. She brings home 2-4 new pieces of art every single day.
So what’s the best way to deal with children’s artwork storage? What are some creative ideas that really work?
I’ve got a few solutions and some apps you can check out. They might help you tackle your own art pile before it takes over the whole house!
First, a quick rundown:
- Get rid of some of it (seriously)
- Pawn some off on relatives
- Buy a big old plastic container for it (quickest, cheapest solution)
- Put it in a three-ring binder
- Get an adorable & handy kid’s art portfolio (Amazon link)
- Make your own book using photos from your phone or a scanner
- Use a service like Artkive that will digitize the art and print a keepsake photo book
Artkive is my favorite digital solution to this problem! They’ll take a bunch of your kid’s art, professional photograph it, and then edit and print it into an absolutely stunning hardcover book.
Try it out now with my link for $20 off your first box.
Decluttering School Artwork
OK the first step here is to make the pile smaller.
Almost all of the storage solutions and ideas I’m going to give you have SOME reasonable limit to how much art you can keep.
Let’s get the emotionally difficult part out of the way right up front.
1. Get rid of (some of) it
I know, I know. But hear me out.
When you look back years from now, you’ll want a handful of samples from each year of school or stage of their development, plus (obviously) anything that’s really special or sentimental to you.
But I’ve found that a bunch of the things in our pile are just pieces of paper with one or two lines or squiggles drawn on them.
It feels sacrilegious to throw them away, but are we really going to miss them when we have SO many better options to keep?
Take this chance to get rid of anything in the pile that’s basically just scrap paper, or super repetitive (our daughter practices writing her name over and over at preschool. The papers are adorable, and I’m so proud of her, but I don’t need 75 copies of the same thing!)
2. Pawn some off on family
If you just have too much to keep, send a pile (or two) off to the grandparents!
They’ll probably be happy to hang a few pieces up in their house and store the rest.
This is a great middle-ground if you just can’t bring yourself to throw away anything your child made, even unfinished squiggles.
Just tell grandma your kid made it for her and she’ll melt.
Storing Your Child’s Art
Now that we’ve gotten rid of a few things and have a slightly smaller pile to manage, let’s talk about the next step: storage.
You have a big pile of artwork from your kid’s school, preschool, or daycare and you just need somewhere better to put it than the kitchen table or stacked up on top of the fridge.
Here are some options:
3. Use a big plastic tub or container
This is the quickest, easiest, and cheapest solution.
Depending on how many papers you have to store, get an appropriately sized bin (opaque or see-through, whatever you want), label it, and just stuff everything in there.
The upside of this method is that, in addition to being inexpensive, you can fit a LOT of art in a big plastic tub. Plus, it’s easy to expand when you need more storage… Just get another tub!
Plus, these will be pretty much water-proof and great at keeping that art safe and dry in the attic or basement for years to come.
The downside is that this is a relatively ugly solution and a giant tub of paperwork and schoolwork (or two or three) will take up a lot of room in your basement, attic, or garage.
4. Buy an art storage portfolio
Not surprisingly, someone eventually figured out that there’d be a market for cute and functional portfolios to keep kid’s art in.
Check out something like the ALEX Toys Artist Studio My Art Portfolio (Amazon link). It’s a really adorable addition to a playroom or art area in your house, and is super space-efficient.
It’ll keep all the papers flat in an accordion-style portfolio and can hold papers up to 12″x18″
Now the downside here is that even this nifty, expandable portfolio may eventually become overwhelmed. We own something very similar to the portfolio I linked to above, and you can see what eventually happened to ours:
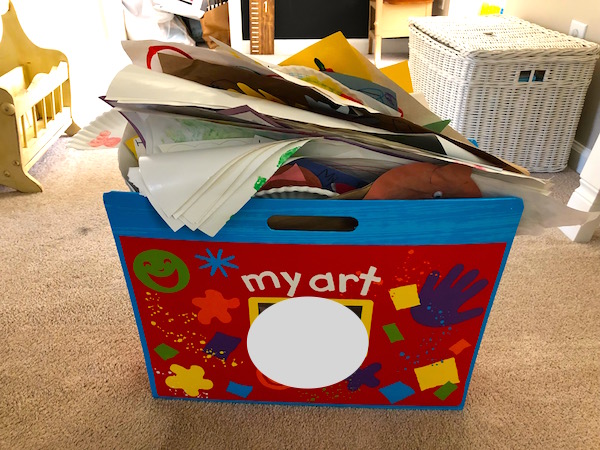
Still, these are a great place to keep the really important stuff after you’ve pared things down a bit!
5. Take pictures! (Save them and/or make your own photo book)
This one is time-consuming, but can be a great option if you’re willing to make a day (or weekend) out of it.
Go through all of your child’s artwork and take pictures of each individual piece with your phone.
(Alternatively, you can use a scanner if you have one. Though this will be EVEN MORE time-consuming. The quality, however, will be fantastic.)
From there, you can do a few different things:
- Just save the photos on your phone, computer, or in the cloud.
- Use a service like Shutterfly to create your own photo book
There are free apps that can help you do this (like Art My Kid Made) but I haven’t heard great things about the usability and features.
You’re better off just putting all the photos on Shutterly, Google Drive, or iCloud where you have free reign to organize, print, share, and do whatever else you might want to do with them.
Once you do this, you’re free to keep only the truly sentimental pieces (or, again, just a few samples from each year) and toss the rest.
You have a digital record of everything your child has ever drawn, hooray!
6. Use a three-ring binder
For a low-tech version of the above, here’s a really cool idea:
Take all of the normal 8×10 art (and smaller pieces) and use a hole punch to put them in a big three-ring binder.
Larger pieces of art can be folded and stored in a folder or divider inside of the binder.
Then, you can decorate the binder however you want and place it neatly on a bookshelf in your house.
The upside here is that these are space efficient, nice to look at (if you decorate them), and a great option if you need to use many binders.
A little row of art binders on a shelf marking each year of school, for example, would be adorable AND well-organized.
The downside is that you have to punch holes in the artwork, and the bigger pieces will have to be folded to fit inside.
In all likelihood, you’ll want to combine a few of these storage solutions for the best results:
- Get rid of as much as you can stomach first!
- Smaller artwork goes in the three-ring binder
- Larger artwork in the accordion portfolio
- Crafts, popsicle-stick art, and other awkwardly shaped or fragile art in a box for storage
Digitizing & book-making service for kids’ art
The last option on my list is the most expensive, but probably the least time consuming and BY FAR the coolest.
If you have a lot of art and are really struggling with getting rid of any of it and storing the rest, you’ll want to check out…
7. Artkive
Artkive is a service that, well, digitally archives your kid’s art!
Here’s how it works:
- Artkive sends you a big box in the mail
- Fill it with your kids art and send it back!
- They take professional photographs of all the art you’ve sent
- Access the photos on your phone or computer any time
- Then, they’ll send you a high-quality, hardcover book with all of the art photos inside
- If you want the art back, you can have it returned. If not, no worries!
It’s a pretty amazing keepsake, and it’s literally as easy as shoving everything into a box.
(Check out full Artkive review here.)
And yes, you could do this yourself with your phone/scanner and Shutterly, but this service (while not cheap) will save you oodles of time and energy.
Check it out and get started right here — follow my link for $20 off your first order!
Wrapping Up
This is a universal parenting problem.
Everyone runs into this issue at some point!
We love the arts and crafts our kids make, but the truth is that most of us have a finite amount of room in our homes for storage. And (sorry, kids) pieces of construction paper with crayon scribbles on them miiiiiight not be worth 6 giant storage tubs in the attic.
I’m still tackling this problem in my own home, but the basic strategy is:
Pare down. Throw away any art that’s not really worth saving, and take a few of the good pieces and send them off to grandma, grandpa, aunts, and uncles.
Save the masterpieces. You’ll want to hold on to hard copies of a few of your kid’s best, cutest, or most sentimental art pieces from each year or stage of life. These are worth saving! Put these in an accordion-style portfolio (Amazon link) for safekeeping.
Digitize the rest. You can do this by hand if you have the time and tech skills (using your phone, camera, or scanner), or send the bulk of the art off to a service like Artkive to save time. Store the photos forever in the cloud (iCloud, Google Drive, etc.) and, if you want a really awesome physical memory of them, print off a photo book.
Save it if you want. At this point, you’ve kept the really good stuff and you have pictures of everything else. But if you want to keep it all, you certainly can! At this point, I’d probably choose to put everything in a 3-ring binder you can decorate and put up on a bookshelf. But if there’s a lot of volume, go with a plastic tub!
And tada!
That’s the basic battle plan for how to get rid of the huge pile of your kid’s or toddler’s artwork that’s eating your kitchen table alive.
I hope that helps, parents, and good luck!